
PrestaShop
PrestaShop is an open source eCommerce platform that works on the PHP scripting language.
Clearpay has a module that can be installed in the back office admin area for PrestaShop.
Before you begin
Before you install the Clearpay module:
- Ensure that you have a Clearpay account, you can sign up here UK
- Check your PrestaShop version. The Clearpay module is only compatible with versions 8, 1.7.x and 1.6.x
Installing and configuring the Clearpay module
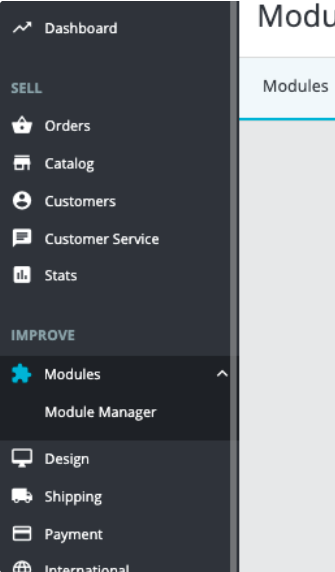
- In the PrestaShop admin panel, navigate to Modules > Module Catalog.
- Search for Clearpay and click Install.

- Click Configure. The Clearpay configuration panel appears.
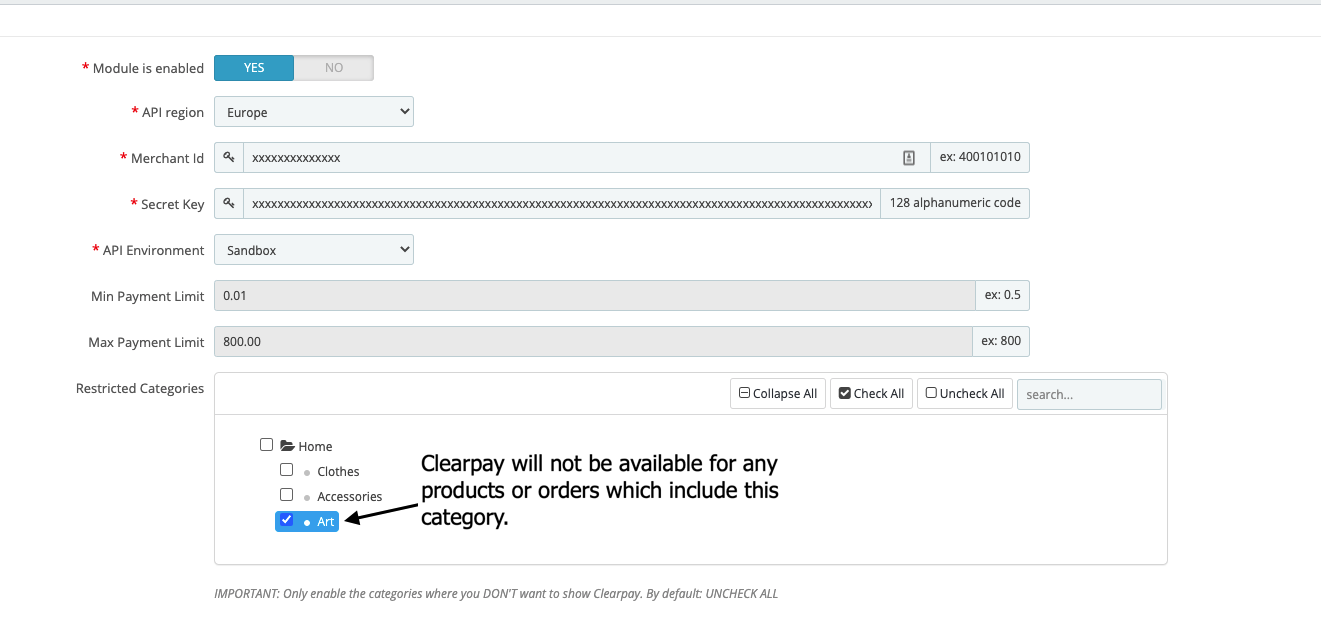
- Enter your Clearpay merchant ID and secret key.
- Ensure the Module is enabled field is toggled to Yes.
- Set the API environment dropdown to Production.
- Click Save.
Check whether the module has been installed and configured correctly, check that the Clearpay option is displayed on your product pages and at checkout.
| Setting | Value |
|---|---|
| Module is enabled | Yes - Clearpay turned on No - Clearpay disabled. |
| Merchant ID | Your 9 digit Clearpay Merchant ID. |
| Secret Key | Your 128 character Clearpay secret key. |
| API Environment | Sandbox Production |
| Min Payment Limit/Max Payment Limit | Current minimum and maximum Clearpay order thresholds. These values are for information purposes and cannot be customised in Prestashop. |
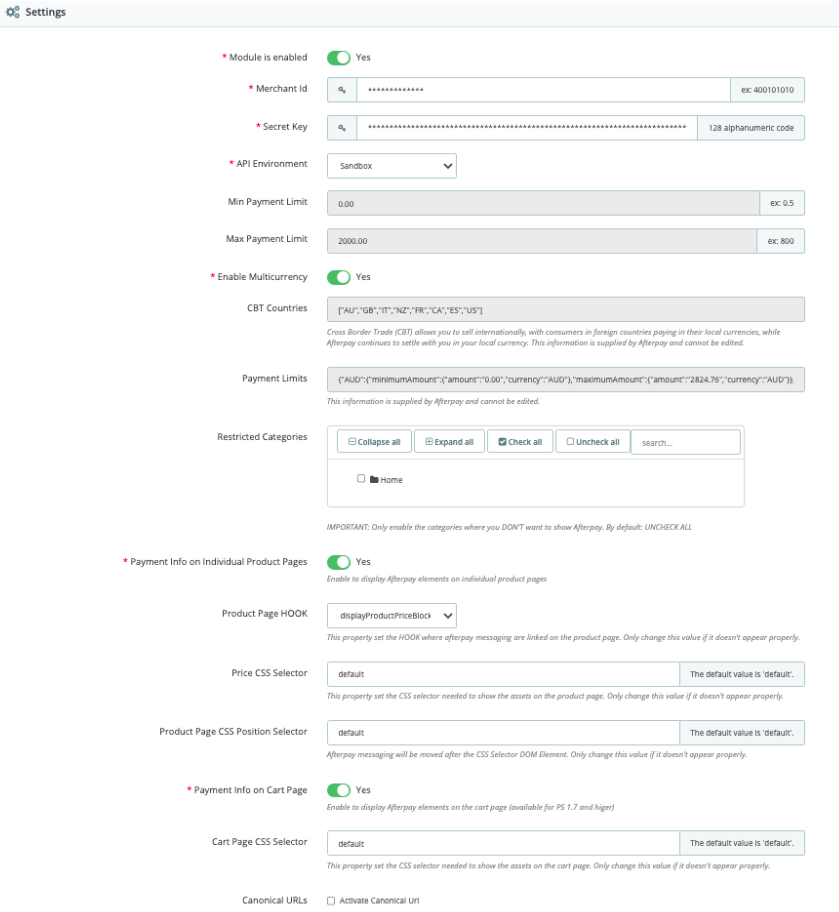
| Enable Multicurrency | Enable multicurrency support. |
| CBT Countries | Cross Border Trade (CBT) allows you to sell internationally, with consumers in foreign countries paying in their local currencies, while Clearpay continues to settle with you in your local currency. This information is supplied by Clearpay and cannot be edited. This value is for information purposes and cannot be customised in Prestashop. |
| Payment Limits | CBT payment limits. This value is for information purposes and cannot be customised in Prestashop. |
| Restricted Categories | This enables the merchant to restrict Clearpay to the selected product categories. |
| Payment Info on Individual Product Page | Enable to display Clearpay elements on individual product pages. |
| Product Page HOOK | This property sets the HOOK where Clearpay messaging is linked on the product page. Only change this value if the messaging doesn't appear correctly. |
| Price CSS Selector | This property sets the CSS selector needed to show the assets on the product page. Only change this value if the assets do not appear correctly. |
| Product Page CSS Position Selector | Clearpay messaging is moved after the CSS Selector DOM Element. Only change this value if the messaging doesn't appear clearly. |
| Payment Info on Cart Page | Enable to display Clearpay elements on the cart page (available for PS 1.7 and higher). |
| Cart Page CSS Selector | This property sets the CSS selector needed to show the assets on the cart page. Only change this value if the assets do not appear clearly. |
| Canonical URLs | Only enable this option if the checkout doesn't redirect clearly to the payment gateway and shows a 404 error. |
| Debug mode | Enable the debug logging. You can see these logs on the Configure > Advanced Parameters > Logs section. |
| Enable Reversal | If Prestashop throws an exception while attempting to finalise an order after payment is approved by Clearpay, the payment can be reversed automatically. This may help to prevent scenarios where customers pay for orders that cannot be fulfilled. Not recommended if an external Order Management System (OMS) is in use. |
FAQ
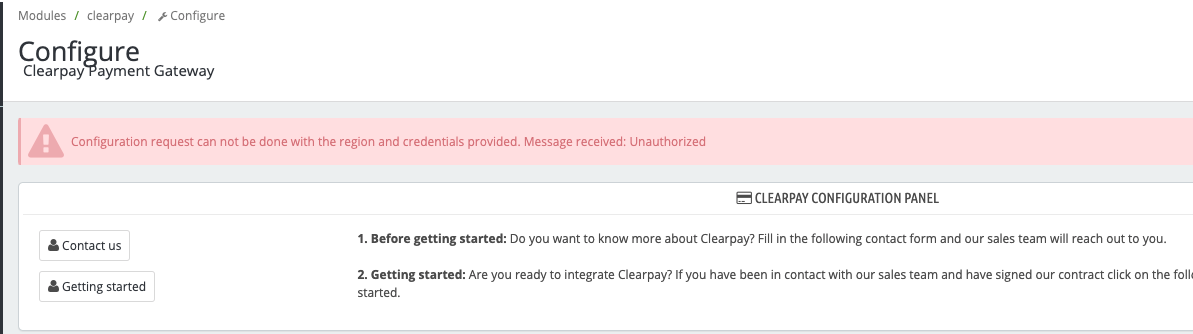
There are two common causes for this error message:
Incorrect merchant credential configuration
Make sure that you enter the Merchant ID and Secret Key correctly. Do not have blank spaces either before or after these codes.
The Environment is set to Sandbox instead of Production
Make sure that you select the Production API environment in the Settings menu.
If you have categories that do not comply with the Clearpay standards for authorized products, you must mark them as restricted on the admin panel configuration.
Those categories selected as restricted will prevent Clearpay being available on the:
Product Page - If the product belongs to a restricted category, the Clearpay widget is not present on the product page.
Cart Page - If some of the products in the cart belong to a restricted category, the Clearpay widget is not present on the cart page.
Checkout page - If some of the products in the checkout belong to a restricted category, Clearpay does not appear on the checkout page as a payment option.
Updating the Clearpay/PrestaShop Module
Clearpay periodically updates its module.
There are two ways to ensure your module is up-to-date:
Note
We strongly recommend that you always use the latest version of the Clearpay module.
Use the PrestaShop Marketplace
When a new version of the Clearpay module is released on the PrestaShop Marketplace, the PrestaShop store should detect the new version. The PrestaShop store automatically shows the upgrade option.
To upgrade, to the following:
- Go to the Module Manager section on the left menu bar. See the picture below:
- Use the search bar to find the Clearpay installed module and click Upgrade available.
- A confirmation window appears, see the picture below:

- Ensure you have a backup of the site before any upgrade. Click Go to maintenance page to avoid possible cache issues. Click Upgrade Anyway if you have a backup of the site and are confident you can problem solve if necessary.
When the upgrade is finished you receive a confirmation message. The Actions button shows the regular options.
Note
Open the Clearpay configuration Settings section to check that all the configurations are correct after the upgrade. See the picture below:
Use the Module Manager Updating Tool
This is a manual update procedure you can use if you have disabled the upgrade option on your store. Do the following:
-
Go to the Module Manager Admin panel.
-
Go to the Prestashop Addons Marketplace and download the upgrade you want. We strongly recommend that you always have the latest version of the code.
-
To download the files you must be logged into your PrestaShop account.
-
Open the Module Manager section and click Upload a module.
-
Select the previously downloaded file from your computer and upload it. See the pictures below:
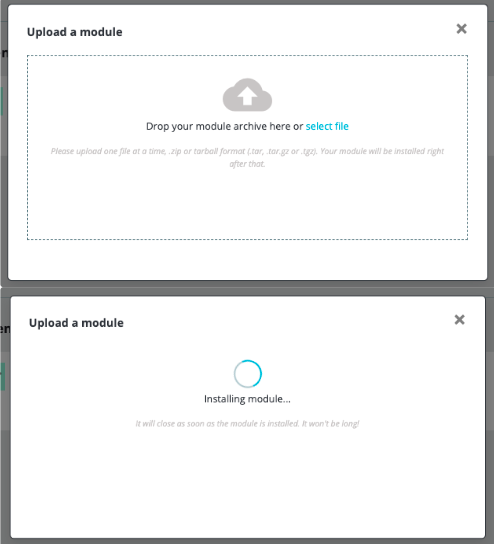
- A confirmation message appears when the module is installed.
Updated 22 days ago